The Oceanfront and Paradise Palms stamp sets by Stampin' Up! used to make a tropical themed card for the Ink & Inspirations Blog Hop

Tropical Palms card for the Ink & Inspirations Blog Hop

Hello and welcome to the Ink & Inspiration Blog Hop whare we are sharing projects inspired by a picture and colour combo. I have used the Oceanfront and Paradise Palms stamp sets to make a card.


Colours used in this project are:


To recreate the Tropical Palms card, you will need:

Tahitian Tide card base – 8¼” by 5⅞” – scored at 4⅛”
Crumb Cake card – 5⅛” by 3⅜”
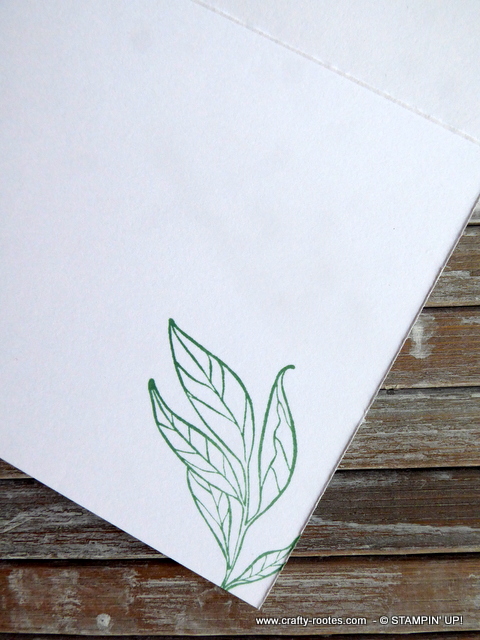
Fluid 100 card – 5” by 3¼”
Very Vanilla card – 2½” by 1”
Very Vanilla card – 5½” by 3¾” – for the inside


Using a Spritzer I sprayed water onto the panel of Fluid 100 card, this will allow the ink to move around on the card.


The Oceanfront and Paradise Palms stamp sets by Stampin' Up! used to make a tropical themed card for the Ink & Inspirations Blog Hop

www.crafty-rootes.co.uk – A tropical themed card made using the Oceanfront and Paradise Palms stamp sets for the Ink & Inspirations Blog Hop

I inked up the ‘sea’ stamp from the Oceanfront stamp set with Bermuda Bay at the top and Coastal Cabana ink at the bottom of the stamp. I stamped down onto the wet Fluid 100 card.


The Oceanfront and Paradise Palms stamp sets by Stampin' Up! used to make a tropical themed card for the Ink & Inspirations Blog Hop

www.crafty-rootes.co.uk – A tropical themed card made using the Oceanfront and Paradise Palms stamp sets for the Ink & Inspirations Blog Hop

The ‘sky’ image from the same stamp set was inked up with Tahitian Tide ink and stamped down as above. I didn’t mind if there was a little mixing of the inks.


The Oceanfront and Paradise Palms stamp sets by Stampin' Up! used to make a tropical themed card for the Ink & Inspirations Blog Hop

www.crafty-rootes.co.uk – A tropical themed card made using the Oceanfront and Paradise Palms stamp sets for the Ink & Inspirations Blog Hop

I left the panel to dry a little before stamping the ‘sand’ image, again from the Oceanfront stamp set in Crumb Cake ink. I used a Heat Tool to completely dry the stamped background before moving onto the next step.


The Oceanfront and Paradise Palms stamp sets by Stampin' Up! used to make a tropical themed card for the Ink & Inspirations Blog Hop

www.crafty-rootes.co.uk – A tropical themed card made using the Oceanfront and Paradise Palms stamp sets for the Ink & Inspirations Blog Hop

Using the Stamparatus I stamped the tree trunks from the Paradise Palms stamp set in Crumb Cake ink. I like to use the Stamparatus with Watercolor card as I can stamp multiple times to get the depth of colour and definition I want. The palm tree tops were added with Old Olive ink using the Stamparatus. The whole panel was then glued to the Crumb Cake layer and then added to the Tahitian Tide card base on Dimensionals.


The Oceanfront and Paradise Palms stamp sets by Stampin' Up! used to make a tropical themed card for the Ink & Inspirations Blog Hop

www.crafty-rootes.co.uk – A tropical themed card made using the Oceanfront and Paradise Palms stamp sets for the Ink & Inspirations Blog Hop

The sentiment was stamped on Very Vanilla card and die cut using the Stylish Shapes Dies and added to the card front to complete the card.

Please hop on  to share the inspiration provided by my crafty friends.


Blog Hop Index


Order goodies/Join My Team

If you don’t have a Stampin’ Up! Demonstrator I would love to be yours!  If you don’t have a catalogue and live in the UK, please let me know and I will be delighted to send you one.  To order any supplies click on the “shop online” button at the top of the page. Alternatively, contact me and I would be happy to place an order for you. To join my team either click on the link above or click on the contact me button above and I will contact you with more information.

Details of the products I used for this project can be found below.

Mo x

Supplies used:


An easel card for Stampers Showcase Blog Hop made using the Grassy Grove stamp set and Grove Dies by Stampin' Up!

Grassy Grove Easel card for the Stampers Showcase Blog Hop

Hello and welcome to the Stampers Showcase Blog Hop where we are sharing Autumn or Halloween themed Projects. I have chosen to share a card made for my son-in-law’s birthday made using the Grassy Grove stamp set and Grove Dies.

Colours used in this project are:


To recreate the grassy grove easel card, you will need:

Pool Party card base – 5½ by 8¼” – scored at 4⅛” and 2 and 1/16”
Early Espresso card – 5¼” by 3⅝”
Pool Party card – 5⅛” by 3½”
Fluid 100 card – 5⅛” by 3½”
Early Espresso card – 5⅜” by 3⅞”
Basic White card – 5¼” by 3½”
Scrap Early Espresso


I used a Water Painter to dampen the panel of Fluid 100 paper. I then added Garden Green ink to the top and Soft Suede ink to the bottom and set it aside to dry.


An easel card for Stampers Showcase Blog Hop made using the Grassy Grove stamp set and Grove Dies by Stampin' Up!

www.crafty-rootes.co.uk – The Grassy Grove stamp set and Grove Dies used to make an easel card for Stampers Showcase Blog Hop

Once the panel was dry, I die cut it using the Grove Dies. I added Mossy Meadow ink to the tree canopy using the Water Painter and Soft Suede ink to add shadows to the tree trunks. The ground was added with Garden Green ink. I die cut 2 deer from scrap Early Espresso card and added them to the panel on Dimensionals.


An easel card for Stampers Showcase Blog Hop made using the Grassy Grove stamp set and Grove Dies by Stampin' Up!

www.crafty-rootes.co.uk – The Grassy Grove stamp set and Grove Dies used to make an easel card for Stampers Showcase Blog Hop

Using pieces of Dimensionals I added the watercolor piece to the Pool Party layer. The whole piece was then mounted onto the 5¼” by 3⅝” piece of Early Espresso.  The panel was then glued to the front of the card base using liquid glue only on the bottom of the panel.


An easel card for Stampers Showcase Blog Hop made using the Grassy Grove stamp set and Grove Dies by Stampin' Up!

www.crafty-rootes.co.uk – The Grassy Grove stamp set and Grove Dies used to make an easel card for Stampers Showcase Blog Hop

I die cut the number 3 and 0 from scrap Early Espresso card, I repeated it until I had three of each. Each number was glued to its mates and then glued to the panel of Basic White card.


An easel card for Stampers Showcase Blog Hop made using the Grassy Grove stamp set and Grove Dies by Stampin' Up!

www.crafty-rootes.co.uk – The Grassy Grove stamp set and Grove Dies used to make an easel card for Stampers Showcase Blog Hop

The word ‘today’ was stamped in Early Espresso ink next to the 30 and trees stamped next to it in Garden Green ink. A trio of Brushed Metallic Dots completes the card.


An easel card for Stampers Showcase Blog Hop made using the Grassy Grove stamp set and Grove Dies by Stampin' Up!

www.crafty-rootes.co.uk – The Grassy Grove stamp set and Grove Dies used to make an easel card for Stampers Showcase Blog Hop

Cute card. I hope you like it.


An easel card for Stampers Showcase Blog Hop made using the Grassy Grove stamp set and Grove Dies by Stampin' Up!

www.crafty-rootes.co.uk – The Grassy Grove stamp set and Grove Dies used to make an easel card for Stampers Showcase Blog Hop


Please hop on to share the projects created by my friends.


Blog Hop Index


Order goodies/Join My Team

If you don’t have a Stampin’ Up! Demonstrator I would love to be yours!  If you don’t have a catalogue and live in the UK, please let me know and I will be delighted to send you one.  To order any supplies click on the “shop online” button at the top of the page. Alternatively, contact me and I would be happy to place an order for you. To join my team either click on the link above or click on the contact me button above and I will contact you with more information.

Details of the products I used for this project can be found below.

Mo x

Supplies used:


A watercolor male birthday card made using the Sale-a-Bration stamp set By the Bay

By the Bay for a Masculine Birthday card

Today I am sharing the card I made for my husband’s birthday. I used the Sale-a-Bration stamp set called By the Bay which has some lovely pencil style sketches on a seaside theme.

Making the By the Bay card

I started with a card base of Balmy Blue cardstock 8” by 7 ½” and scored it at 4” on the long side to make a long thin card.

A watercolor male birthday card made using the Sale-a-Bration stamp set By the Bay

www.crafty-rootes.com – A masculine birthday card made using the By the Bay stamp set

I cut a piece of Watercolor Paper 5¼” by 2” and inserted it into my Stamparatus. I placed the image of the group of seabirds onto the Water color Paper, closed the panel of the Stamparatus to pick up the stamp. I then inked the stamp with Memento Tuxedo Black ink and stamped it down. Using the Stamparatus gives me the chance to re-stamp the image if it isn’t dark enough. I moved the stamp along the panel to give a row of birds and set it aside to dry.

A watercolor male birthday card made using the Sale-a-Bration stamp set By the Bay

www.crafty-rootes.com – A masculine birthday card made using the By the Bay stamp set

Using an Aqua painter I applied ink to color the image. I used Balmy Blue and Blueberry Bushel inks for the water, Gray Granite for the birds and Mossy Meadow for the background.

A watercolor male birthday card made using the Sale-a-Bration stamp set By the Bay

www.crafty-rootes.com – A masculine birthday card made using the By the Bay stamp set

I mounted the stamped panel onto a layer of Blueberry Bushel cardstock measuring 5½” by 2¼” using Multipurpose Liquid Adhesive. I added a panel of Whisper White cardstock 6” by 2¾” using the same glue.

A watercolor male birthday card made using the Sale-a-Bration stamp set By the Bay

www.crafty-rootes.com – A masculine birthday card made using the By the Bay stamp set

The whole piece was added to the card front with Stampin’ Dimensionals and I added some Clear Wink of Stella to the water for a little glimmer.

A watercolor male birthday card made using the Sale-a-Bration stamp set By the Bay

www.crafty-rootes.com – A masculine birthday card made using the By the Bay stamp set

I added a layer of Whisper White cardstock 7” by 3 ½” to the inside having stamped the same group of birds on the panel. I also stamped the same image on an envelope.

A very clean and simple card, hope you like it.

If you don’t have a Stampin’ Up! Demonstrator I would love to be yours!  If you don’t have a catalogue and live in the UK please let me know and I will be delighted to send you one.  To order any supplies click on the “shop online” button at the top of the page. Alternatively, contact me and I would be happy to place an order for you.

Thanks for visiting my blog today, I love to read what you think of my projects so please do let me know. In line with new Data Protection Legislation (GDPR), by commenting you do so in the knowledge that your name & comment are visible to all who visit this blog and you thereby consent to the use of that personal information for that specific purpose. Please stop by again soon.

Details of the products I used for this project can be found below.

Mo x

Supplies used:


A pretty floral card made for the Just Add Ink #441 challenge using Stampin' Up! products

Just Add Ink #441 Challenge using Wonderful Romance

Today I am sharing the card I made for the Just Add Ink #441 challenge which this week features a photo. The challenge asked us to use the photo as inspiration when making our own project to share. I chose to use the lovely soft colour palette for my card.

Making the card

I decided to use the gorgeous new stamp set called Wonderful Romance with the co-ordinating Wonderful Floral dies to make my project.

A pretty floral card made for the Just Add Ink #441 challenge using Stampin' Up! products

www.crafty-rootes.com -Wonderful Romance stamp set and Wonderful Floral dies used for the Just Add Ink #441 Challenge

I began by taking a scrap panel of Watercolor Paper which I placed onto my Stamparatus. Because the surface of Watercolor Paper is textured it is often difficult to get a good stamped image and using the Stamparatus allows me to stamp repeatedly in the same position, building up the layers of ink until I have achieved the depth of colour I am looking for. I placed the largest floral image face down onto the Watercolor Paper, closed the ‘door’ and picked up the stamp. I inked up the stamp using StaZon black ink for this project as I knew I would be watercoloring the image.

A pretty floral card made for the Just Add Ink #441 challenge using Stampin' Up! products

www.crafty-rootes.com -Wonderful Romance stamp set and Wonderful Floral dies used for the Just Add Ink #441 Challenge

Taking inspiration from the photograph I chose to use Mint Macaron, Petal Pink, Highland Heather and Crumb Cake inks and used my Aquapainter to add colour to the image. I love watercolouring; by layering the ink a little at a time you can achieve great texture and dimension. When the Watercolor Paper was dry I ran it through my Bis Shot with the co-ordinating Wonderful Floral Dies. I also die cut the sweet label from the same set of dies and stamp the sentiment from the same stamp set in the same way using my Stamparatus to get a good dark impression. I added the tiny flower from the stamp set and used Highland Heather and my Aquaipainter to colour it in.

A pretty floral card made for the Just Add Ink #441 challenge using Stampin' Up! products

www.crafty-rootes.com -Wonderful Romance stamp set and Wonderful Floral dies used for the Just Add Ink #441 Challenge

Taking a 5⅜” by 3⅝” piece of Petal Pink cardstock and the new Lace Textured Impressions Embossing Folder I ran it through my Big Shot. I added the embossed panel to a piece of Mint Macaron cardstock measuring 5½” by 3¾” using Multipurpose Liquid Adhesive. This panel was then added with the same adhesive to the front of a Thick Whisper White card base.

A pretty floral card made for the Just Add Ink #441 challenge using Stampin' Up! products

www.crafty-rootes.com -Wonderful Romance stamp set and Wonderful Floral dies used for the Just Add Ink #441 Challenge

I laid the die cut floral piece over the sentiment panel and adhered them together using Multipurpose Liquid Adhesive and added the whole piece to the card front on Stampin’ Dimensionals. I added  some of the Share What You Love Artisan Pearls to the flower centres to complete the card.

A pretty floral card made for the Just Add Ink #441 challenge using Stampin' Up! products

www.crafty-rootes.com -Wonderful Romance stamp set and Wonderful Floral dies used for the Just Add Ink #441 Challenge

I stamped the smaller leaf image in Mint Macaron ink inside the card and on the envelope.

Such a pretty card, I really hope you like it.

If you don’t have a Stampin’ Up! Demonstrator I would love to be yours!  If you don’t have a catalogue and live in the UK please let me know and I will be delighted to send you one.  To order any supplies click on the “shop online” button at the top of the page. Alternatively, contact me and I would be happy to place an order for you.

Thanks for visiting my blog today, I love to read what you think of my projects so please do let me know. In line with new Data Protection Legislation (GDPR), by commenting you do so in the knowledge that your name & comment are visible to all who visit this blog and you thereby consent to the use of that personal information for that specific purpose. Please stop by again soon.

Details of the products I used for this project can be found below.

Mo x

Supplies used:


Jan 2019 Stamp 'N Hop blog hop using the Lovely Lattice stamp set

Lovely Lattice used for the Stamp’N Hop blog hop

Hello and welcome to January’s Stamp ‘N Hop blog hop where this month’s theme is Sale-a-Bration.  I love, love, love Sale-a-Bration……free stuff….oh yes bring it on and such great stuff as well.

If you have hopped over from Vicki Hunter  I am sure you enjoyed the project she shared as much as I did. After a lot of deliberation I have chosen to use the stunning stamp set called Lovely Lattice to make my card as I love the versatility of this set.

 Making the card

I started with a panel of Watercolor Paper measuring 5¼” by 3½” and stamped the large gorgeous image from the Lovely Lattice stamp set in Versamark ink and yes I did remember to use my embossing buddy, whoop whoop. I covered the panel with White embossing powder and heat set it using my Heat Tool.

Jan 2019 Stamp 'N Hop blog hop using the Lovely Lattice stamp set

ww.crafty-rootes.com – Lovely Lattice stamp set used for the Stamp ‘N Hop blog hop

I wanted to watercolor this image and find the easiest way to do this is to use my ink pad to press some ink onto a clear block and colour with an Aquapainter. I used Coastal Cabana for the flowers, starting with a light touch and adding more layers of colour to give depth and dimension. The flower centres were coloured using So Saffron ink and Granny Apple Green was used for the leaves. I added Smoky Slate around the whole image to ground it and also coloured the lattice area with the Smoky Slate again adding depth by layering up the colour.

Jan 2019 Stamp 'N Hop blog hop using the Lovely Lattice stamp set

ww.crafty-rootes.com – Lovely Lattice stamp set used for the Stamp ‘N Hop blog hop

The sentiment from the Amazing life stamp set was stamped in Versamark onto a scrap of Basic Gray cardstock, covered in White embossing powder and heat set with my Heat Tool.

I used the Detailed Trio Punch to round the upper left and lower right corner of the stamped layer and a layer of So Saffron measuring 5⅜” by 3⅝” and a layer of Coastal Cabana measuring 5⅝” by 3⅞” and adhered the layers together with Multipurpose Liquid Adhesive.

Jan 2019 Stamp 'N Hop blog hop using the Lovely Lattice stamp set

ww.crafty-rootes.com – Lovely Lattice stamp set used for the Stamp ‘N Hop blog hop

The finished topper was then added to a Smoky Slate card base and the sentiment was added using Multipurpose Liquid Adhesive. To finish the card I added a scatter of Share What You Love Artisan Pearls.

I absolutely love this card, the soft colours work so well with this image. Please hop along to see what the lovely Susan Simpson is sharing with us today.

 If you don’t have a Stampin’ Up! Demonstrator I would love to be yours!  If you don’t have a catalogue and live in the UK please let me know and I will be delighted to send you one.  To order any supplies click on the “shop online” button at the top of the page. Alternatively, contact me and I would be happy to place an order for you.

Thanks for visiting my blog today, I love to read what you think of my projects so please do let me know. In line with new Data Protection Legislation (GDPR), by commenting you do so in the knowledge that your name & comment are visible to all who visit this blog and you thereby consent to the use of that personal information for that specific purpose. Please stop by again soon.

Details of the products I used for this project can be found below.

Mo x

Pia Gerhardt
Vicki Hunter
Mo Rootes – You Are Here!
Susan Simpson
Sandra Roberts
Vicky Wright
Jenna Watkins
Tracy Marie Lewis
Jo Blackman
Rebecca-Jo Unwin
Laura Mackie
Cheryl Taylor
Anastasia Radloff
Sharon Dalton
Jenn Charles

Supplies Used

Country Home stamp set makes a Pretty watercolored rustic jug full of flowers for a simple but stunning card.

Country Home

Today I have been playing with the lovely Country Home stamp set and my Aquapainter. I love colouring in and using an Aquapainter and my ink pads makes this so easy.

Making the Country Home card

I cut a piece of Watercolor Paper 5” by 3½” and stamped the jug image in Momento Tuxedo Black ink in the lower right hand corner. I stamped the foliage image in the same ink on top of the jug and set the panel aside to dry.

Country Home stamp set makes a Pretty watercolored rustic jug full of flowers for a simple but stunning card.

www.crafty-rootes.com – Country Home stamp set by Stampin’ Up! used for a simple watercolored card.

Whilst I was waiting for the panel to try I cut a piece of Gray Granite cardstock 5⅞” by 1½”, spritzed it lightly with water and ran it through the Big Shot with the Tin Tile embossing folder. I love the great definition this folder gives.

Country Home stamp set makes a Pretty watercolored rustic jug full of flowers for a simple but stunning card.

www.crafty-rootes.com – Country Home stamp set by Stampin’ Up! used for a simple watercolored card.

For my colour palette I chose Gray Granite for the jug, Crumb Cake for the bulrushes, Granny Apple Green for the large leaves, Lemon Lime Twist & Daffodil Delight for the Artichoke, Mossy Meadow for the small leaves and Grapefruit Grove for the small buds. I squeezed ink into the lid of each pad and used my Aquapainter to colour in.

Country Home stamp set makes a Pretty watercolored rustic jug full of flowers for a simple but stunning card.

www.crafty-rootes.com – Country Home stamp set by Stampin’ Up! used for a simple watercolored card.

The sentiment was stamped in Gray Granite ink. I then wrapped a piece of Granny Apple Green ½” ribbon around the left side of the panel securing it on the back with Sellotape.

Country Home stamp set makes a Pretty watercolored rustic jug full of flowers for a simple but stunning card.

www.crafty-rootes.com – Country Home stamp set by Stampin’ Up! used for a simple watercolored card.

I added the Gray Granite embossed piece to the front of a Grapefruit Grove card base using Multipurpose Liquid Adhesive. I rounded the upper right corner of the card base and the stamped watercoloured panel using the Detailed Trio Punch. The stamped panel was added over top on Stampin’ Dimensionals. I added a panel of Very Vanilla cardstock measuring 5⅜” by 3⅝” to the inside of the card having stamped the tile image in Granny Apple Green ink across the bottom. I stamped the same image in the same ink down the side of a Very vanilla envelope. to the inside of the card. To finish off I added a scatter of Faceted Dots.

Such a simple, pretty card. I hope you like it.

If you don’t have a Stampin’ Up! Demonstrator I would love to be yours!  If you don’t have a catalogue and live in the UK please let me know and I will be delighted to send you one.  To order any supplies click on the “shop online” button at the top of the page. Alternatively, contact me and I would be happy to place an order for you.

Thanks for visiting my blog today, I love to read what you think of my projects so please do let me know. In line with new Data Protection Legislation (GDPR), by commenting you do so in the knowledge that your name & comment are visible to all who visit this blog and you thereby consent to the use of that personal information for that specific purpose. Please stop by again soon.

Details of the products I used for this project can be found below.

Mo x

Supplies Used