A pretty Christmas card made using the Christmas Gleaming stamp set for the Just Add Ink colour challenge #474

Christmas Gleaming for the Just Add Ink colour challenge #474

Today I am sharing a pretty card made  for the Just Add Ink colour challenge using the Christmas Gleaming Stamp set. Th colours we have been given re Rococo Rose, Blackberry Bliss and Mossy Meadow – not a colour combo I would usually put together.

To recreate the Christmas Gleaming card you will need:

Blackberry Bliss card base – 8¼” by 5⅞” scored at 4⅛” – rounded upper right corner
Rococo Rose – 4⅝” by 3⅛” – rounded upper right corner
Whisper White – 4 ½” by 3” – rounded upper right corner
Whisper White – 5⅜” by 3⅝” – rounded upper right corner
Scrap Whisper White

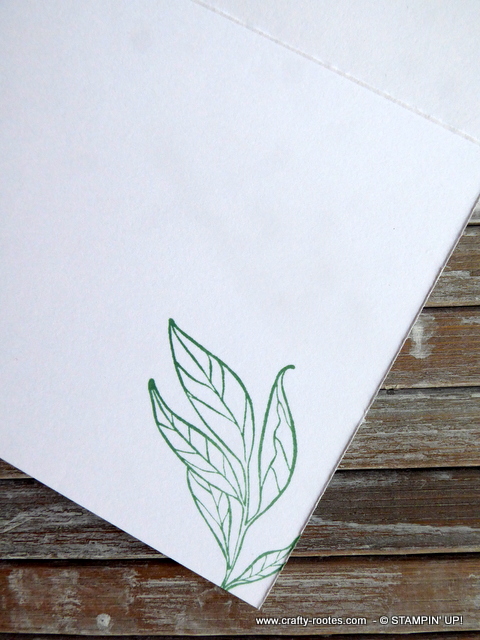
I began by stamping the 3 gorgeous baubles from the Christmas Gleaming stamp set in Rococo Rose, Blackberry Bliss and Mossy Meadow ink. I think they look lovely and the colours do work well together.

A pretty Christmas card made using the Christmas Gleaming stamp set for the Just Add Ink colour challenge #474

www.crafty-rootes.com – A lovely Christmas card made for the Just Add Ink colour Challenge #474 using Christmas Gleaming stamp set

The stamped panel was mounted on the Rococo Rose layer using Multipurpose Liquid Adhesive.

A pretty Christmas card made using the Christmas Gleaming stamp set for the Just Add Ink colour challenge #474

www.crafty-rootes.com – A lovely Christmas card made for the Just Add Ink colour Challenge #474 using Christmas Gleaming stamp set

This panel was then added to the Blackberry Bliss card base with Dimensionals.

A pretty Christmas card made using the Christmas Gleaming stamp set for the Just Add Ink colour challenge #474

www.crafty-rootes.com – A lovely Christmas card made for the Just Add Ink colour Challenge #474 using Christmas Gleaming stamp set

The sentiment from the same stamp set was stamped on scrap Whisper White cardstock with Blackberry Bliss ink and fussy cut using my sharp scissors. It was added to the card front with the same liquid glue.

A pretty Christmas card made using the Christmas Gleaming stamp set for the Just Add Ink colour challenge #474

www.crafty-rootes.com – A lovely Christmas card made for the Just Add Ink colour Challenge #474 using Christmas Gleaming stamp set

I added a trio of 2019 – 2021 In Color Faceted Dots to complete the card.

A pretty Christmas card made using the Christmas Gleaming stamp set for the Just Add Ink colour challenge #474

www.crafty-rootes.com – A lovely Christmas card made for the Just Add Ink colour Challenge #474 using Christmas Gleaming stamp set

I hope you like it.

If you don’t have a Stampin’ Up! Demonstrator I would love to be yours!  If you don’t have a catalogue and live in the UK please let me know and I will be delighted to send you one.  To order any supplies click on the “shop online” button at the top of the page. Alternatively, contact me and I would be happy to place an order for you.

Thanks for visiting my blog today, I love to read what you think of my projects so please do let me know. In line with new Data Protection Legislation (GDPR), by commenting you do so in the knowledge that your name & comment are visible to all who visit this blog and you thereby consent to the use of that personal information for that specific purpose. Please stop by again soon.

Details of the products I used for this project can be found below.

Mo x

Supplies used:


Clean and simple card using the Tropical Escape dsp and the Beautiful Promenade stamp set

Tropical Escape for the Just Add Ink #458 challenge

Today I am sharing a sweet card made for the Just Add Ink #458 challenge, the theme this time is ‘letters’. I used the retiring Tropical Escape designer series paper (dsp) and the Beautiful Promenade stamp set and co-ordinating Beautiful Layers dies to make the card..

To recreate the Tropical Escape card you will need;

Thick Whisper White cardstock 8¼” by 5⅞” scored and folded at 4⅛” on the long side – rounded upper right corner
Tropical Escape dsp 4⅛” by 3¼”
Blackberry Bliss cardstock 4⅛” by ¼”
Scrap Whisper White and Mint Macaron

I glued to dsp panel to the card front using Multipurpose Liquid Adhesive and added the stick of Blackberry Bliss on top.

Clean and simple card using the Tropical Escape dsp and the Beautiful Promenade stamp set

www.crafty-rootes.com -Just Add Ink challenge #458 using the Tropical Escape dsp and the Beautiful Promenade stamp set

I stamped the flower on the scrap Whisper White in Blackberry Bliss ink and die cut it out using my Big Shot and the Beautiful Layers dies.

Clean and simple card using the Tropical Escape dsp and the Beautiful Promenade stamp set

www.crafty-rootes.com -Just Add Ink challenge #458 using the Tropical Escape dsp and the Beautiful Promenade stamp set

I cut out the leaves using the same die set turning them over whilst still in the die and applying a dimensional to each leaf. This keeps all the little pieces inside the leaves which were then carefully poked out of the die. The leaves were added to the back of the flower with a little glue.

Clean and simple card using the Tropical Escape dsp and the Beautiful Promenade stamp set

www.crafty-rootes.com -Just Add Ink challenge #458 using the Tropical Escape dsp and the Beautiful Promenade stamp set

The sentiment from the Butterfly Gala stamp set was stamped in blackberry Bliss ink and the flower added to the card front with dimensionals. I added a trio of Share What You Love Artisan Pearls to finish off the card.

Clean and simple card using the Tropical Escape dsp and the Beautiful Promenade stamp set

www.crafty-rootes.com -Just Add Ink challenge #458 using the Tropical Escape dsp and the Beautiful Promenade stamp set

I stamped the same flower inside the card and on the envelope in the Blackberry Bliss ink.

Clean and simple card using the Tropical Escape dsp and the Beautiful Promenade stamp set

www.crafty-rootes.com -Just Add Ink challenge #458 using the Tropical Escape dsp and the Beautiful Promenade stamp set

A very simple but pretty card, I hope you like it.

 If you don’t have a Stampin’ Up! Demonstrator I would love to be yours!  If you don’t have a catalogue and live in the UK please let me know and I will be delighted to send you one.  To order any supplies click on the “shop online” button at the top of the page. Alternatively, contact me and I would be happy to place an order for you.

Thanks for visiting my blog today, I love to read what you think of my projects so please do let me know. In line with new Data Protection Legislation (GDPR), by commenting you do so in the knowledge that your name & comment are visible to all who visit this blog and you thereby consent to the use of that personal information for that specific purpose. Please stop by again soon.

Details of the products I used for this project can be found below.

Mo x

Supplies used:

A quirky card made for the JAI #442 challenge using the Dear Doily and Wonderful Romance stamp sets

Dear Doily for the Just Add Ink #442 challenge

I have made such a sweet card today for the Just Add Ink #442 challenge. This challenge this week is a really quirky sketch which I thought would work perfectly with the Dear Doily stamp set and the co-ordinating Doily Builder dies.

Making the card

I began by stamping the sentiment from the Dear Doily stamp set in Shaded Spruce ink onto a scarp panel of Whisper White. I used one of the doily dies from the Doily Builder Stamp set, I didn’t realise that the die I chose would cut out the circle die and the inside of the circle separately……… When I placed the white circle die cut and the pierced rim onto the panel of Rich Razzelberry cardstock, measuring 5⅜” by 3⅝” it didn’t look right. After a bit of trial and error I settled for die cutting the same piece from Mint Macaron cardstock and adding back the stamped Whisper White centre.

A quirky card made for the JAI #442 challenge using the Dear Doily and Wonderful Romance stamp sets

www.crafty-rootes.com – Dear Doily stamp set and dies used for the Just Add Ink #442 challenge.

I stamped the leafy frond from the Wonderful Romance stamp set in Rich Razzelberry ink onto the Rich Razzelberry panel and mounted the stamped doily piece in the centre on Stampin’ Dimensionals.

A quirky card made for the JAI #442 challenge using the Dear Doily and Wonderful Romance stamp sets

www.crafty-rootes.com – Dear Doily stamp set and dies used for the Just Add Ink #442 challenge.

Using the Wonderful Floral dies and my Big Shot I cut some leaves from scrap Petal Pink cardstock and from Vellum cardstock and tucked them in under the doily using Multipurpose Liquid Adhesive to secure them. I love the embossed texture on these leaves.

A quirky card made for the JAI #442 challenge using the Dear Doily and Wonderful Romance stamp sets

www.crafty-rootes.com – Dear Doily stamp set and dies used for the Just Add Ink #442 challenge.

The whole Rich Razzelberry panel was layered onto a Whisper White piece measuring 5 ½” by 3 ¾” with Multipurpose Liquid Adhesive. This panel was then added to a Petal Pink card base. A trio of Share What You Love Artisan Pearls finished off the card front.

A quirky card made for the JAI #442 challenge using the Dear Doily and Wonderful Romance stamp sets

www.crafty-rootes.com – Dear Doily stamp set and dies used for the Just Add Ink #442 challenge.

I stamped the leafy frond in Rich Razzelberry ink onto a piece of Whisper White cardstock 5⅜” by 3⅝” and added it to the inside of the card. The same image was stamped on a Whisper White envelope.

A quirky card made for the JAI #442 challenge using the Dear Doily and Wonderful Romance stamp sets

www.crafty-rootes.com – Dear Doily stamp set and dies used for the Just Add Ink #442 challenge.

I am really happy with how this card turned out and I really love the swirly font of this sentiment.

If you don’t have a Stampin’ Up! Demonstrator I would love to be yours!  If you don’t have a catalogue and live in the UK please let me know and I will be delighted to send you one.  To order any supplies click on the “shop online” button at the top of the page. Alternatively, contact me and I would be happy to place an order for you.

Thanks for visiting my blog today, I love to read what you think of my projects so please do let me know. In line with new Data Protection Legislation (GDPR), by commenting you do so in the knowledge that your name & comment are visible to all who visit this blog and you thereby consent to the use of that personal information for that specific purpose. Please stop by again soon.

Details of the products I used for this project can be found below.

Mo x

Supplies used:


A pretty floral card made for the Just Add Ink #441 challenge using Stampin' Up! products

Just Add Ink #441 Challenge using Wonderful Romance

Today I am sharing the card I made for the Just Add Ink #441 challenge which this week features a photo. The challenge asked us to use the photo as inspiration when making our own project to share. I chose to use the lovely soft colour palette for my card.

Making the card

I decided to use the gorgeous new stamp set called Wonderful Romance with the co-ordinating Wonderful Floral dies to make my project.

A pretty floral card made for the Just Add Ink #441 challenge using Stampin' Up! products

www.crafty-rootes.com -Wonderful Romance stamp set and Wonderful Floral dies used for the Just Add Ink #441 Challenge

I began by taking a scrap panel of Watercolor Paper which I placed onto my Stamparatus. Because the surface of Watercolor Paper is textured it is often difficult to get a good stamped image and using the Stamparatus allows me to stamp repeatedly in the same position, building up the layers of ink until I have achieved the depth of colour I am looking for. I placed the largest floral image face down onto the Watercolor Paper, closed the ‘door’ and picked up the stamp. I inked up the stamp using StaZon black ink for this project as I knew I would be watercoloring the image.

A pretty floral card made for the Just Add Ink #441 challenge using Stampin' Up! products

www.crafty-rootes.com -Wonderful Romance stamp set and Wonderful Floral dies used for the Just Add Ink #441 Challenge

Taking inspiration from the photograph I chose to use Mint Macaron, Petal Pink, Highland Heather and Crumb Cake inks and used my Aquapainter to add colour to the image. I love watercolouring; by layering the ink a little at a time you can achieve great texture and dimension. When the Watercolor Paper was dry I ran it through my Bis Shot with the co-ordinating Wonderful Floral Dies. I also die cut the sweet label from the same set of dies and stamp the sentiment from the same stamp set in the same way using my Stamparatus to get a good dark impression. I added the tiny flower from the stamp set and used Highland Heather and my Aquaipainter to colour it in.

A pretty floral card made for the Just Add Ink #441 challenge using Stampin' Up! products

www.crafty-rootes.com -Wonderful Romance stamp set and Wonderful Floral dies used for the Just Add Ink #441 Challenge

Taking a 5⅜” by 3⅝” piece of Petal Pink cardstock and the new Lace Textured Impressions Embossing Folder I ran it through my Big Shot. I added the embossed panel to a piece of Mint Macaron cardstock measuring 5½” by 3¾” using Multipurpose Liquid Adhesive. This panel was then added with the same adhesive to the front of a Thick Whisper White card base.

A pretty floral card made for the Just Add Ink #441 challenge using Stampin' Up! products

www.crafty-rootes.com -Wonderful Romance stamp set and Wonderful Floral dies used for the Just Add Ink #441 Challenge

I laid the die cut floral piece over the sentiment panel and adhered them together using Multipurpose Liquid Adhesive and added the whole piece to the card front on Stampin’ Dimensionals. I added  some of the Share What You Love Artisan Pearls to the flower centres to complete the card.

A pretty floral card made for the Just Add Ink #441 challenge using Stampin' Up! products

www.crafty-rootes.com -Wonderful Romance stamp set and Wonderful Floral dies used for the Just Add Ink #441 Challenge

I stamped the smaller leaf image in Mint Macaron ink inside the card and on the envelope.

Such a pretty card, I really hope you like it.

If you don’t have a Stampin’ Up! Demonstrator I would love to be yours!  If you don’t have a catalogue and live in the UK please let me know and I will be delighted to send you one.  To order any supplies click on the “shop online” button at the top of the page. Alternatively, contact me and I would be happy to place an order for you.

Thanks for visiting my blog today, I love to read what you think of my projects so please do let me know. In line with new Data Protection Legislation (GDPR), by commenting you do so in the knowledge that your name & comment are visible to all who visit this blog and you thereby consent to the use of that personal information for that specific purpose. Please stop by again soon.

Details of the products I used for this project can be found below.

Mo x

Supplies used:


Sweet card made for the Just Add Ink #440 Callenge using the Tea Time framelits and Tea Together stamp set.

Tea Together for the Just Add Ink #440 Challenge

Today I have used the Tea Together stamp set and co-ordinating Tea Time dies to make a card for the Just Add Ink #440 challenge. The theme this week is ‘add something new. The stamp set and dies were my new items and I used them with the Tropical Escape dsp and the Scallops embossing folder.

Making the card

I started by choosing a piece of the Tropical Escape dsp, and after a lot of trial and error went for the soft Blushing Bride floral pattern. I decided to use the Stamparatus to stamp the teapot image; I wanted the image to show on the dsp and with the Stamparatus I could stamp it multiple times to get the depth of colour I was looking for. I used Basic Gray ink to do my stamping. When the image was stamped I die cut it using my Big Shot and the Tea Time dies.

Sweet card made for the Just Add Ink #440 Callenge using the Tea Time framelits and Tea Together stamp set.

www.crafty-rootes.com -Tea Together stamp set and Tea Time framelits used for the Just Add Ink #440 Challenge

I chose a Smoky Slate card base and stamped the flower from the Tropical Chic stamp set in Smoky Slate ink randomly over the card front. The flower is the identical image to the flower on the piece of die cut dsp. The tone on tone stamping just gives some interest to the background.

Taking a panel of Whisper White cardstock 5⅜” by 3⅝” I ran it through the Big Shot with the Striped Scallops Embossing Folder and added it to the card front on Stampin’ Dimensionals. I added the die cut tea pot to the embossed panel with Multipurpose Liquid Adhesive.

Sweet card made for the Just Add Ink #440 Callenge using the Tea Time framelits and Tea Together stamp set.

www.crafty-rootes.com -Tea Together stamp set and Tea Time framelits used for the Just Add Ink #440 Challenge

I stamped the sentiment from the Balloon Celebrations stamp set in Blushing Bride and Smoky Slate onto scrap Whisper White cardstock before using the Banner Triple Punch to flag the end. I added a thinner strip of Blushing Bride cardstock behind and added the piece to the card front with Multipurpose Liquid Adhesive.  To finish the card I added a scattering of the gorgeous Share What You love Artisan Pearls.

Sweet card made for the Just Add Ink #440 Callenge using the Tea Time framelits and Tea Together stamp set.

www.crafty-rootes.com -Tea Together stamp set and Tea Time framelits used for the Just Add Ink #440 Challenge

I really love the soft colours of this card. I hope you like it.

If you don’t have a Stampin’ Up! Demonstrator I would love to be yours!  If you don’t have a catalogue and live in the UK please let me know and I will be delighted to send you one.  To order any supplies click on the “shop online” button at the top of the page. Alternatively, contact me and I would be happy to place an order for you.

Thanks for visiting my blog today, I love to read what you think of my projects so please do let me know. In line with new Data Protection Legislation (GDPR), by commenting you do so in the knowledge that your name & comment are visible to all who visit this blog and you thereby consent to the use of that personal information for that specific purpose. Please stop by again soon.

Details of the products I used for this project can be found below.

Mo x

Supplies used:


A Pop-Up Ferrero Rocher box made using the Santa's Workshop dsp by Stampin' Up!

Pop-Up Ferrero Rocher Treat Box for the Just Add Ink #439 challenge

Today I am sharing the little treat boxes I made to decorate our Christmas table. I saw a video recently by the Paper Pixie where she made this box, click on the link to watch her video.  I have changed the cardstock, dsp and decoration.

To make the box you need;

Cardstock – 6⅝” by 4⅝” – I used either Poppy Parade and Garden Green

Designer Series Paper (DSP)  – 6⅜” by 2⅜ – I used Santa’s Workshop

Making the box base

I used my Paper Trimmer to score the cardstock as some of the measurements were in sixteenths of an inch. Taking a piece of cardstock I scored on the long side at 19/16”, 3⅛”, 4 11/16” and 6¼” and on the short side at 1 9/16” and 3¼”.

A Pop-Up Ferrero Rocher box made using the Santa's Workshop dsp by Stampin' Up!

ww.crafty-rootes.com – Pop-Up box made using the Santa’s Workshop dsp

Taking a sharp pair of scissors I trimmed away both of the small rectangles and cut up either side of all the score lines and removed each ridge as shown in the photograph.

A Pop-Up Ferrero Rocher box made using the Santa's Workshop dsp by Stampin' Up!

ww.crafty-rootes.com – Pop-Up box made using the Santa’s Workshop dsp

I folded and burnished all the score lines using my Bone Folder and applied Tear and Tape to the small side tab and to the 4 smaller panels, removed the backing from the Tear and Tape and folded the panels in to re-enforce the box sides.

A Pop-Up Ferrero Rocher box made using the Santa's Workshop dsp by Stampin' Up!

ww.crafty-rootes.com – Pop-Up box made using the Santa’s Workshop dsp

I removed the backing from the Tear and Tape on the side tab and closed the box. I folded in both side panels forming the bottom of the box, then the back panel, added some Tear and Tape to the front panel and stuck it down.

A Pop-Up Ferrero Rocher box made using the Santa's Workshop dsp by Stampin' Up!

ww.crafty-rootes.com – Pop-Up box made using the Santa’s Workshop dsp

A Pop-Up Ferrero Rocher box made using the Santa's Workshop dsp by Stampin' Up!

ww.crafty-rootes.com – Pop-Up box made using the Santa’s Workshop dsp

Making the box top

Next I took the piece of Designer Series Paper (dsp) and sored it on the long side at 1 ½”, 3”, 4 ½” and 6”. I then added a small notch at ¾”, 2 ¼”, 3 ¾” and 5 ¼”. The dsp was then rotated clockwise and I scored on the short side at 19/16”.

A Pop-Up Ferrero Rocher box made using the Santa's Workshop dsp by Stampin' Up!

ww.crafty-rootes.com – Pop-Up box made using the Santa’s Workshop dsp

I folded and burnished the score lines using my fingers, trimmed a small wedge from the top and bottom of the smallest panel. Using my Take Your Pick Tool with the stylus end and a steel ruler I scored a triangle from the corner of each panel to the notch then from the notch to the next corner as shown in the photograph.

A Pop-Up Ferrero Rocher box made using the Santa's Workshop dsp by Stampin' Up!

ww.crafty-rootes.com – Pop-Up box made using the Santa’s Workshop dsp

A Pop-Up Ferrero Rocher box made using the Santa's Workshop dsp by Stampin' Up!

ww.crafty-rootes.com – Pop-Up box made using the Santa’s Workshop dsp

Using my fingers I carefully folded on all the diagonal lines as shown.

A Pop-Up Ferrero Rocher box made using the Santa's Workshop dsp by Stampin' Up!

ww.crafty-rootes.com – Pop-Up box made using the Santa’s Workshop dsp

Tear and Tape was then added to the side tab and the sides of the box brought together. The dsp piece was then slide down inside the box, a treat was added before pressing on all 4 corners of the dsp piece to close the box.

A Pop-Up Ferrero Rocher box made using the Santa's Workshop dsp by Stampin' Up!

ww.crafty-rootes.com – Pop-Up box made using the Santa’s Workshop dsp

I wrapped a piece of Poppy Parade Striped Ribbon around the box securing it with a small piece of Tear and Tape and added a bow in the same ribbon.

A Pop-Up Ferrero Rocher box made using the Santa's Workshop dsp by Stampin' Up!

ww.crafty-rootes.com – Pop-Up box made using the Santa’s Workshop dsp

A Pop-Up Ferrero Rocher box made using the Santa's Workshop dsp by Stampin' Up!

ww.crafty-rootes.com – Pop-Up box made using the Santa’s Workshop dsp

If you don’t have a Stampin’ Up! Demonstrator I would love to be yours!  If you don’t have a catalogue and live in the UK please let me know and I will be delighted to send you one.  To order any supplies click on the “shop online” button at the top of the page. Alternatively, contact me and I would be happy to place an order for you.

Thanks for visiting my blog today, I love to read what you think of my projects so please do let me know. In line with new Data Protection Legislation (GDPR), by commenting you do so in the knowledge that your name & comment are visible to all who visit this blog and you thereby consent to the use of that personal information for that specific purpose. Please stop by again soon.

Details of the products I used for this project can be found below.

Mo x

Supplies Used

Beauty Abounds stamp set by Stampin' Up! used for the Just Add Ink #438 colour challenge

Beauty Abounds for the Just Add Ink Colour Challenge #438

I have made a great card today using the Beauty Abounds stamp set for the Just Add Ink #438 challenge. The theme was to make a project using Lovely Lipstick and Granny Apple Green plus one other colour of our choice and I choose Gray Granite.

Making the card

I began with a piece of Whisper White cardstock measuring 5¼” by 3½” and stamped the large floral swirl from the Beauty Abounds stamp set in Gray Granite ink onto the panel.

Beauty Abounds stamp set by Stampin' Up! used for the Just Add Ink #438 colour challenge

www.crafty-rootes.com – Beauty Abounds stamp set used for the Just Add Ink #438 colour challenge

Taking the Lovely Lipstick and the Granny Apple Green Blends Combos I coloured in all the flowers and leaves. I stamped the sentiment in Lovely Lipstick onto a scrap of Whisper White cardstock and die cut it using my Big Shot and the Stitched Shapes Framelit Dies. I added a butterfly in Gray Granite ink above the sentiment. I die cut a scalloped Granny Apple Green circle using the Layering Circle dies and added it to the back of the sentiment with Multipurpose Liquid Adhesive.

Beauty Abounds stamp set by Stampin' Up! used for the Just Add Ink #438 colour challenge

www.crafty-rootes.com – Beauty Abounds stamp set used for the Just Add Ink #438 colour challenge

I added 2 more Gray Granite butterflies to the stamped panel and coloured them all in with the Lovely Lipstick and Granny Apple Green Blends.

Beauty Abounds stamp set by Stampin' Up! used for the Just Add Ink #438 colour challenge

www.crafty-rootes.com – Beauty Abounds stamp set used for the Just Add Ink #438 colour challenge

I rounded the upper right corner of the panel with the Detailed Trio Punch and added the sentiment on Dimensionals to the bottom right corner. I added the stamped layer to a panel of Lovely Lipstick cardstock measuring 5⅜” by 3⅜” using Multipurpose Liquid Adhesive and added the whole panel to a Granny Apple Green card base with the same glue. To finish I added a liberal scattering of Basic Rhinestones.

If you don’t have a Stampin’ Up! Demonstrator I would love to be yours!  If you don’t have a catalogue and live in the UK please let me know and I will be delighted to send you one.  To order any supplies click on the “shop online” button at the top of the page. Alternatively, contact me and I would be happy to place an order for you.

Thanks for visiting my blog today, I love to read what you think of my projects so please do let me know. In line with new Data Protection Legislation (GDPR), by commenting you do so in the knowledge that your name & comment are visible to all who visit this blog and you thereby consent to the use of that personal information for that specific purpose. Please stop by again soon.

Details of the products I used for this project can be found below.

Mo x

Supplies Used