


Hello and welcome to the Crafty Challenge Blog Hop where we have a sketch to give us inspiration today. I have made my card using the Shell Collecting stamp set and So Swirly Embossing Folder.
Colours used to make this card are:
I created the shell collecting card using the following supplies:
Petunia Pop card base – 8¼” by 5⅞” scored at 4⅛” on the long side
Basic White – 5⅝” by 3⅞”
Pretty In Pink – 5½” by 3¾”
Basic White – 3 ¾” by 2⅞”
Petunia Pop – 4⅛” by ⅝”
Basic White – 5½” by 3¾” for the inside
I embossed the panel of Pretty In Pink card using the So Swirly Embossing Folder and adhered it to the largest panel of Basic White card. The whole piece was glued to the Petunia Pop card base.
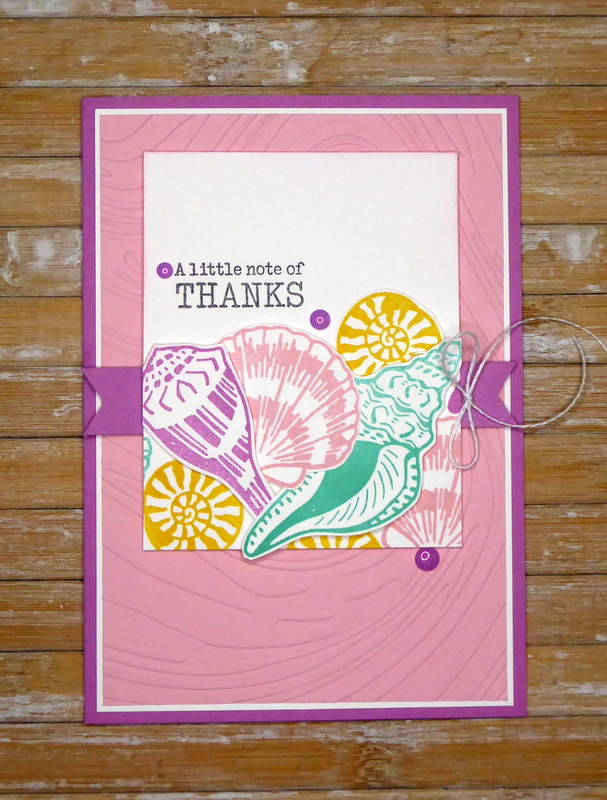
www.crafty-rootes.co.uk – The Shell Collecting and Notes of Spring stamp sets used with the So Swirly Embossing Folder to make a thank you card – Crafty Challenge Blog Hop
I stamped the seashells on scrap Basic White card using Pretty In Pink, Petunia Pop, Daffodil Delight and Summer Splash inks. These were fussy cut out using sharp scissors.

www.crafty-rootes.co.uk – The Shell Collecting and Notes of Spring stamp sets used with the So Swirly Embossing Folder to make a thank you card – Crafty Challenge Blog Hop
I placed them on the smaller piece of Basic White card and stamped in the gaps using the same images and ink colours. The fussy cut images were then added on Dimensionals to the panel.

www.crafty-rootes.co.uk – The Shell Collecting and Notes of Spring stamp sets used with the So Swirly Embossing Folder to make a thank you card – Crafty Challenge Blog Hop
The sentiment, from the Notes of Spring stamp set was stamped in Memento Tuxedo Black ink onto the decorated panel. I flagged the ends of the thin strip of Petunia Popp card, glued it to the back of the decorated panel before adding the whole piece to the card front on Dimensionals.

www.crafty-rootes.co.uk – The Shell Collecting and Notes of Spring stamp sets used with the So Swirly Embossing Folder to make a thank you card – Crafty Challenge Blog Hop
A trio of 2024 – 2026 In Color Flat Pearls and a White Baker’s Twine bow finishes the card.

www.crafty-rootes.co.uk – The Shell Collecting and Notes of Spring stamp sets used with the So Swirly Embossing Folder to make a thank you card – Crafty Challenge Blog Hop
Please hop onto share the inspiration provided by my crafty friends.
Order goodies/Join My Team
I would love to be your demonstrator if you don’t already have one and live in the UK. I would also be delighted to send you a catalogue if you do not have a demonstrator. I would be happy to place an order for you, or you can order directly by clicking on the “shop online” button.
Contact me for information about joining my team or click on the ‘Join My Team’ button
Details of the products I used for this project can be found below.
Mo x
Supplies used:


